1.) Fish Trap
This works best with a two liter bottle because of the size. First, cut the top off to create a funnel. Then you cut the threaded neck off to create a bigger opening in the funnel, or leave it in its original state depending on what size fish you want, or expect to trap.
 Then push the cut top into the bottom portion. You can punch holes through both pieces and secure together with fishing line or any cordage. Punch holes in the sides of the bottle and the bottom to allow for water flow.
The fish swim in the enlarged end and are funneled into the bottom portion. You can cut a flap in the bottom of the trap to release any fish you do not want. Bait and then secure the trap with line or weigh down by placing stones inside.
Use the same method, but do not cut the opening bigger to trap live bait.
2.) Cordage
There are several ways of doing this, but for a field expedient method you would need a stump or log and a sharp knife, and of course a plastic bottle. Cut the bottom off just above the seam. Plunge the knife (preferably a fixed bladed one) in the stump/log so it can be utilized without you having to hold it. Start a cut, a thin cut, because remember you are making cordage. Pull the starter end against the knife blade with one hand while turning the bottle with the other the hand. Pulling the cut end will do most of the work, and the other hand essentially holds the bottle to make sure the cut is consistent. (see Creek Stewart demonstrate in the video below)
Once you have cut all that you can wind the cordage around a spindle made from wood or from whatever is available to make it easy to carry and to use. You can cut the plastic bottle into cordage using scissors as well, or set up a system similar to an apple peeler. Keep it simple however, in a survival situation the more complicated the method the greater chance of failure.
3.) Water Filter
Cut the bottom off above the seam, and leave the cap on for now. To make a filter you would need filtering medium. In a survival situation charcoal is ideal along with sand, coffee filters, cheese cloth, fine gravel, or grasses. The best case scenario is that you have all, or several of the recommended filtering mediums that can be layered in the bottle.
The finer material will go in first, so layer from finest material to more coarse until about two inches from the top. Open the cap to allow water to flow out, or punch holes in the cap. If using without a cap stuff cheese cloth in the opening or place a coffee filter in first so the finer material does not fall through the opening. If you do punch holes in the cap punch the holes from inside the cap so the ridges created go with the flow of water.
4.) Water Still
 Cut the bottom off above the seam, and then fold up an inch or so all the way around the bottom to create a trough. Leave the cap on because this method will not work well without the cap. This method only works when there is sufficient sunlight if you are relying on the evaporative method (water to vapor process). We will discuss salt water distillation next. Once you have the trough made you can place the container over some cloth that is soaked with contaminated water, over a mud puddle, or over any saturated soil or other material.
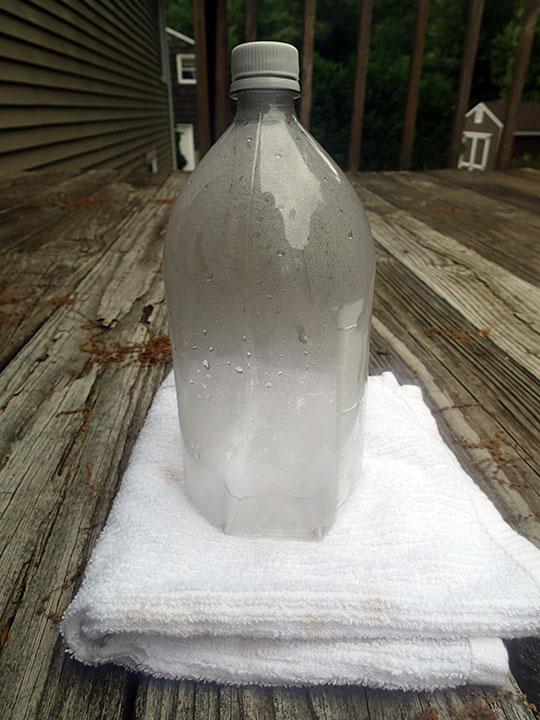
The sun’s ray will begin to evaporate the moisture, which will rise inside the plastic container. Without a cap the water will evaporate through the opening leaving you much less water volume. The moisture will condense on the plastic sides and then begin to flow into the channel you created. The water is purified because the evaporated process leaves contaminates behind. Once you have collected enough water you can uncap the bottle and drink, as you would form any beverage container.
5.) Salt Water Distillation
Build your container as described in number four. Once constructed suspend the open side down over a vessel of boiling salt water. The bottle will have to be suspended so the rising steam collects inside the bottle. The steam, which is distilled water, will condense on the plastic and run into the trough. You can distill any contaminated water this way. It does not have to just be saltwater.
6.) Water Pasteurization
Pasteurization is a process, named after scientist Louis Pasteur. The method simply applies heat to destroy pathogens. Sounds simple enough, but when heat is not available then what do you do. You turn to solar heat.
Remember in a field environment, you will not have any way of knowing whether the process has worked or not, and you probably would not have a way of gauging the temperature either. This is not a foolproof method of making contaminated water safe to drink, and it certainly would not purify any water contaminated with chemicals or toxins. Only use this method when no other means of purification is available. This method is time consuming as well.
The plastic container must be clear, and the water filtered. Turbidity will affect the pasteurization process. If you do not have way of filtering then you must first let the debris settle, and this will take some time.
Once the water has been filtered or allowed to settle place the bottle in direct sunlight. It must remain in direct sunlight for at least six hours. To enhance the process, you can place the container on a reflective surface such as a solar blanket, or on a piece of aluminum foil. This will reflect the sun’s rays into the bottle with more intensity. This process however, does not employ the same methods as a solar cooker (U.S. National Library of Medicine, n.d.).
Reminder: If you used the container to collect the contaminated water the cap threads where you would drink from or pour water from will be contaminated. Use alcohol wipes to clean the area, or use hand sanitizer that contains alcohol if you have nothing else available.
7.) Drinking Cup/Food Serving Container
Do not discard the bottom portion. It can be used as a serving container or water cup or used for other purposes.
8.) Water Storage
This one is rather obvious, but it needs to be mentioned. Remember to thoroughly clean the container before storing drinking water, and mark the date if possible on the outside. A 10:1 solution of water and bleach can be used to sanitize the inside of the container.
9.) Fill with Clear Water to Create Light in Your Shelter
Fill as many as need and secure in your shelter walls and particularly in the roof to allow light in during the day. It will be dark inside even during the day, so to save on batteries or to save fire fuel, you can use the bottles to allow light in without allowing cold in or allowing heat to escape.
10.) Food Scoop
Cut the top off and then clean and dry well and then use as a scoop for, grains, sugar, flour or even for pet food.
Miscellaneous Uses around the Home or Camp
Storage of dry foods, grains, beans and so on.
Cut the top off and use the bottom for growing plants, or for seed starting. For seed starting you can start the seeds in the bottom half and then tape the top half over the bottom to retain moisture levels until the seeds have germinated. Water the seeds through the cap opening by dribbling water through do not pour in the water.
U.S. National Library of Medicine. (n.d.). Retrieved 2015, from http://www.ncbi.nlm.nih.gov/pmc/articles/PMC91110/
http://prepforshtf.com/top-10-survival-uses-for-plastic-bottles/#.VfB7ABFViko
Glass is the best all around container for storing water, but not only is it fragile, it’s heavy as well.
The trade-off for convenience & portability is the BPA.
Unfortunately.